Emergency HVAC Replacement Checklist
If you find yourself facing an HVAC emergency and in need of a replacement, it’s important to follow a systematic checklist to ensure a smooth and efficient process. By following these essential steps, you can minimize downtime and ensure the long-term efficiency of your new system.
1. Assess the Maintenance History: Before proceeding with a replacement, review the maintenance records of your existing HVAC equipment. This will help you determine if the system has been properly cared for and if any recurring issues may warrant a replacement.
2. Contact HVAC Technicians: Reach out to reputable HVAC technicians who specialize in emergency replacements. They will conduct a thorough evaluation of your system and provide recommendations for the most suitable replacement options based on your specific needs.
3. Evaluate Energy Efficiency: As you explore replacement options with your HVAC technician, prioritize energy efficiency. Look for systems with high SEER ratings (Seasonal Energy Efficiency Ratio) and ENERGY STAR certifications, as they will help minimize your energy consumption and operating costs in the long run.
4. Create a Checklist: Work with your HVAC technician to create a checklist that outlines all the necessary steps for the replacement process. This will help ensure that important details are not overlooked during the installation.
5. Plan for Emergency Situations: Consider any potential emergencies that may arise during the replacement process, such as power outages or unforeseen complications. Develop contingency plans to address these situations and minimize any disruptions to your comfort.
6. Schedule the Replacement: Once you have finalized the replacement plan, schedule the installation with your HVAC technician. Coordinate the logistics and ensure that all the necessary equipment and materials are readily available for a seamless transition.
Remember, an emergency HVAC replacement is an opportunity to improve the efficiency and comfort of your space. Take the time to research and plan, and consult with professionals to make informed decisions that will benefit you in the long run.
Emergency HVAC Replacement Checklist
When faced with an emergency HVAC replacement, it is important to have a checklist to ensure the process goes smoothly. Follow these essential steps to guarantee the safety and efficiency of your new HVAC equipment.
- Hire a Qualified Technician: It is crucial to enlist the help of a licensed HVAC technician who specializes in emergency replacements. They will have the knowledge and expertise to carry out the job safely and efficiently.
- Assess the Equipment: Evaluate the existing HVAC system and identify any specific requirements for replacement. Consider factors such as size, capacity, and efficiency to ensure the new equipment meets your needs.
- Perform Maintenance: Before installing the new HVAC system, conduct any necessary maintenance on ductwork, vents, and other components. This will optimize the performance of the new equipment and prolong its lifespan.
- Plan for the Emergency: In the event of an emergency HVAC replacement, it is important to have a contingency plan in place. Consider the availability of equipment and resources to minimize downtime and ensure a smooth transition.
- Ensure Safety Measures: Prioritize safety during the replacement process. Make sure all electrical connections are properly installed and secured, and that all safety switches and controls are functioning correctly.
- Maximize Efficiency: Opt for energy-efficient HVAC equipment to lower your energy consumption and reduce costs in the long run. Look for units with high SEER (Seasonal Energy Efficiency Ratio) ratings and ENERGY STAR certifications.
- Test and Verify: After installation, test the new HVAC system to ensure it is operating correctly. Verify that air flow, temperature, and humidity levels meet the desired standards, and adjust settings if necessary.
By following this emergency HVAC replacement checklist, you can ensure a smooth and efficient transition to new equipment, guaranteeing the safety and comfort of your space.
Step 1: Assessing the Situation
When faced with an emergency HVAC situation, it is essential to assess the problem before taking any further action. This step is crucial in order to determine the appropriate course of action and to ensure the safety and efficiency of your HVAC system.
Maintenance: Take a moment to evaluate the maintenance history of your HVAC equipment. Has regular maintenance been performed? If not, it may be time to consider a replacement.
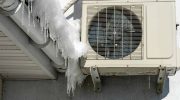
Emergency: Are you currently facing an emergency situation? If so, it is crucial to act quickly to prevent further damage to your HVAC system and to maintain a safe environment.
HVAC Technician: Contact a professional HVAC technician to assess the situation. They have the necessary knowledge and expertise to identify the problem and recommend the best course of action.
Efficiency: Consider the efficiency of your current HVAC equipment. If it is old and outdated, a replacement may be necessary in order to improve energy efficiency and save on utility costs.
Safety: Prioritize safety when dealing with an emergency HVAC situation. Ensure that everyone in the vicinity is aware of the issue and take necessary precautions to prevent any potential hazards.
Replacement: Depending on the severity of the problem and the age of your current HVAC equipment, a replacement may be the best solution. Consult with your HVAC technician to determine if this is the appropriate course of action.
Equipment: Assess the condition of your current HVAC equipment. If it is consistently failing or showing signs of significant wear and tear, it may be time to consider replacing your system.
By following these essential steps and assessing the situation thoroughly, you can make informed decisions regarding your emergency HVAC situation and ensure the long-term efficiency and safety of your HVAC system.
Step 2: Finding a Reliable Contractor
When it comes to emergency HVAC replacement, finding a reliable contractor is crucial. Remember to follow this checklist to ensure you find a contractor who can provide the efficiency and safety your replacement equipment needs.
- Research your options: Start by researching local HVAC contractors who specialize in emergency replacements. Look for contractors with experience in handling emergency situations and who have a good reputation for quality work.
- Check for proper licensing and certifications: Verify that the contractor you are considering has the necessary licenses and certifications required by your state or region. This will ensure they have the knowledge and expertise to handle your emergency HVAC replacement.
- Read customer reviews: Take the time to read customer reviews and testimonials to get a better understanding of the contractor’s reputation. Look for reviews that mention their efficiency, timeliness, and overall satisfaction.
- Ask for references: Don’t hesitate to ask the contractor for references from past clients. Contact these references to inquire about their experience with the contractor and whether they would recommend their services.
- Request proof of insurance: Before hiring a contractor, make sure they have proper insurance coverage. This will protect you from any liability in case of accidents or damage that may occur during the replacement process.
- Get multiple quotes: Obtain quotes from at least three different contractors. This will allow you to compare prices, services offered, and warranties provided. Remember, the cheapest option may not always be the best choice, so consider all factors before making a decision.
- Ask about ongoing maintenance: Inquire about the contractor’s maintenance services for the new HVAC equipment. Regular maintenance is essential for the longevity and efficiency of your system, so choose a contractor who offers this service.
- Sign a detailed contract: Once you have chosen a contractor, make sure to sign a detailed contract that outlines the scope of work, pricing, timelines, and any other important details. This will protect both parties and ensure that everyone is on the same page.
By following this checklist, you can find a reliable contractor who will effectively handle your emergency HVAC replacement, providing you with the efficiency, safety, and peace of mind you deserve.
Step 3: Determining Your Budget
When it comes to emergency HVAC replacement, one of the crucial factors to consider is your budget. It’s essential to determine how much you are willing to invest in a new HVAC system. Having a clear understanding of your budget will help you make informed decisions and ensure that you select the right equipment without compromising on quality, efficiency, and safety.
Here are some important considerations to keep in mind when determining your budget for HVAC replacement:
- Assess your financial capacity: Consider your current financial situation and determine how much you can comfortably allocate towards your emergency HVAC replacement.
- Evaluate the efficiency: While budget is important, don’t prioritize cost over efficiency. Look for HVAC systems that offer high energy efficiency ratings, as they can save you significant costs on energy bills in the long run.
- Consult with a technician: An experienced HVAC technician can provide valuable insights into the cost of different HVAC systems and help you choose the best one within your budget.
- Consider long-term savings: Although you may have to invest more upfront for a high-quality HVAC system, it can result in long-term savings through reduced energy consumption and maintenance costs.
- Research equipment prices: Take the time to research and compare the prices of different HVAC equipment models and brands. This will give you a better understanding of the average cost range for your desired equipment.
By considering these factors, you can make a budget allocation that ensures you get a reliable and efficient HVAC replacement without overspending. Remember, your HVAC system is a long-term investment that affects your comfort, safety, and energy bills, so choosing wisely is essential.
Step 4: Choosing the Right System
When it comes to emergency HVAC replacement, selecting the right system is crucial. The replacement system you choose should meet your specific needs and requirements. Here are some important factors to consider:
- Type of System: Determine whether you need a central air conditioning system, a heat pump, or a ductless mini-split system. Each type has its own advantages and disadvantages, and a professional HVAC technician can help you choose the best option for your home or business.
- Size and Capacity: The replacement system should be properly sized to ensure optimum efficiency and performance. A system that is too small may struggle to cool or heat your space efficiently, while a system that is too large may cycle on and off frequently, resulting in excessive energy consumption.
- Energy Efficiency: Look for HVAC systems with high energy efficiency ratings. Energy-efficient systems can help you save on utility bills in the long run. Check for the SEER (Seasonal Energy Efficiency Ratio) rating for cooling systems and the HSPF (Heating Seasonal Performance Factor) rating for heating systems.
- Maintenance Requirements: Consider the maintenance needs of the replacement system. Some systems require regular maintenance, such as filter changes, while others may have advanced features like self-cleaning capabilities. Choose a system that aligns with your maintenance preferences and schedule.
- Equipment Features: Research the features and options available with different HVAC systems. Consider features like programmable thermostats, zoning capabilities, air purification systems, and smart home integration. These features can enhance comfort, convenience, and indoor air quality.
By carefully evaluating these factors, you can make an informed decision and choose the right replacement HVAC system for your emergency needs. Don’t hesitate to consult with a professional HVAC technician for expert guidance and recommendations.
Step 5: Sizing the Unit
Sizing the unit correctly is an essential step in the emergency HVAC replacement checklist. It involves determining the appropriate size of the new equipment to ensure optimal performance and energy efficiency. This task should be performed by a qualified HVAC technician who has the necessary knowledge and experience.
The HVAC technician will consider various factors when sizing the unit, including the size of the space to be cooled or heated, the insulation levels, the number of windows and doors, and the layout of the area. They will also take into account any specific requirements or preferences you may have.
Proper sizing is crucial to ensure that the new unit can effectively meet your heating and cooling needs without consuming excessive energy or causing unnecessary wear and tear on the equipment. A unit that is too small may struggle to adequately heat or cool the space, while an oversized unit may cycle on and off frequently, leading to higher energy bills and reduced equipment lifespan.
During the sizing process, the technician may use industry-standard calculations and measurements to determine the appropriate unit size. This may involve assessing the British Thermal Units (BTUs) or tonnage required to adequately cool or heat the space.
In addition to selecting the right size, the technician will also consider safety and installation requirements. They will ensure that the new unit meets all necessary safety codes and regulations and is properly installed in accordance with manufacturer guidelines.
By properly sizing the unit, you can ensure that your emergency HVAC replacement is successful, providing you with reliable heating and cooling for years to come.
Step 6: Preparing for Installation
Before your emergency HVAC replacement can take place, it’s important to properly prepare for the installation. Following this checklist will help ensure a smooth and efficient process:
- Clear the area around the HVAC equipment to allow easy access for the technicians.
- Remove any obstacles or personal belongings that may hinder the installation process.
- Ensure that the power to the HVAC system is turned off for safety.
- Disconnect any electrical or plumbing connections related to the old unit.
- If necessary, shut off the gas supply and disconnect the gas line.
- Prepare the designated installation area by cleaning and leveling the ground.
- Check the dimensions of the new HVAC unit to ensure it will fit properly.
- Ensure that the necessary tools and equipment are available for the installation.
- Review the manufacturer’s instructions and warranty information.
- Contact the installation team to confirm the scheduled installation date and time.
By following this step-by-step checklist, you can ensure that your emergency HVAC replacement is completed efficiently and with minimal disruption to your daily routine.
Step 7: Obtaining Permits
Obtaining the necessary permits is an important step during any emergency HVAC replacement project. This ensures compliance with safety regulations and local building codes. Without the required permits, you may face legal consequences and potential fines.
Here is a checklist to guide you through the permit acquisition process:
- Identify the permits required: Contact your local building department to determine the permits needed for your emergency HVAC replacement. This may include mechanical, electrical, or general construction permits.
- Review the application process: Understand the specific requirements for each permit. These could include submitting plans or specifications, paying fees, and scheduling inspections.
- Prepare the necessary documents: Gather all the required documents, such as equipment specifications, contractor licenses, proof of insurance, and property ownership documents.
- Complete the permit application: Fill out the permit application form accurately and provide all the requested information. Be sure to include any additional details or considerations specific to your emergency HVAC replacement.
- Submit the application: Submit the completed permit application, along with any supporting documents, to the local building department. Ensure that you meet all submission deadlines and pay any required fees.
- Schedule inspections: Once the permit is approved, you will need to schedule inspections at specific stages of your emergency HVAC replacement. Coordinate with the building department to ensure timely inspections.
- Maintain compliance: Throughout the project, ensure you adhere to all safety regulations and building codes. Any changes or deviations from the approved plans must be communicated to the building department.
Obtaining the necessary permits demonstrates your commitment to safety and compliance. It also provides protection for you, your property, and the occupants by ensuring that the emergency HVAC replacement follows industry standards.
Remember, obtaining permits is a crucial step in any emergency HVAC replacement project. It is essential to follow all local guidelines to ensure the efficient and safe operation of your new HVAC equipment.
Step 8: Removing the Old Unit
After completing the necessary maintenance and replacement steps in this checklist, it’s time to remove the old HVAC unit. Removing the old unit is a crucial step in the emergency HVAC replacement process, as it paves the way for the installation of the new equipment.
To ensure efficiency and safety, it is recommended to hire a professional HVAC technician for this task. They have the knowledge and experience to handle the removal process properly, minimizing any risks and damage.
Here are the essential steps involved in removing the old HVAC unit:
- Power off: Before starting the removal process, make sure to switch off the power supply to the unit at both the electrical panel and the outdoor disconnect.
- Disconnect the equipment: Carefully disconnect all the electrical connections, including the power supply, thermostat wiring, and low voltage wiring.
- Shut off the gas supply: If your HVAC system operates on gas, shut off the gas supply before proceeding with removal.
- Disconnect the condensate drain: Locate and disconnect the condensate drain line from the unit.
- Detach ductwork: In order to remove the old unit, detach the ductwork from the unit to free it from any connections.
- Remove the refrigerant lines: If your HVAC system uses refrigerant, a licensed technician should safely remove any remaining refrigerant from the unit and disconnect the refrigerant lines.
- Remove the screws or bolts: The HVAC unit is typically secured with screws or bolts. Loosen and remove them to detach the unit from its mounting.
- Proper disposal: Once the old unit is completely disconnected, it should be properly disposed of according to local regulations and guidelines.
Removing the old unit marks a significant milestone in the emergency HVAC replacement process. It clears the way for the installation of new equipment and sets the foundation for efficient and safe operation of your HVAC system.
Step 9: Installing the New Unit
Now that you have properly removed the old HVAC unit, it’s time to install the new one. This step is crucial as it will ensure the efficiency, maintenance, and safety of your new system.
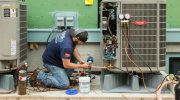
- Hire a professional technician: It is highly recommended to hire a qualified HVAC technician for installing the new unit. They have the necessary skills and knowledge to handle the installation process safely.
- Follow the checklist: The technician will follow a checklist to ensure that all necessary steps are completed during the installation. This will guarantee that the new unit is properly set up and functions optimally.
- Ensure proper placement: The technician will carefully choose the location for the new unit, considering factors such as accessibility for maintenance, airflow, and safety regulations.
- Connect the necessary components: The technician will connect the new unit to the existing ductwork, electrical system, and thermostat. This step requires precision to ensure proper functionality.
- Test the system: After installation, the technician will test the new unit to ensure that it is functioning correctly. They will check for any leaks, unusual noises, or malfunctions.
Installing the new HVAC unit is the final step in the emergency replacement process. By hiring a professional technician and following the necessary steps, you can ensure that your new system operates efficiently, requires minimal maintenance, and provides a safe environment for your home or business.
Step 10: Connecting the Electrical Wiring
Connecting the electrical wiring is a crucial step in the emergency HVAC replacement process. It requires the expertise of a trained technician to ensure safety and efficiency.
Why is it important?
- Proper electrical connections are necessary for the equipment to function correctly.
- Incorrect wiring can lead to equipment malfunctions or even electrical hazards.
- The technician will follow electrical safety protocols to prevent accidents or damage.
What does the technician do?
- The technician will disconnect power from the HVAC unit to prevent any electrical accidents.
- They will carefully remove the electrical panel cover to access the wiring.
- Using industry-standard practices, the technician will connect the various wires to their corresponding terminals.
- They will double-check the connections to ensure everything is properly attached and secure.
- The technician will then reattach the electrical panel cover and restore power to the HVAC unit.
- After connecting the electrical wiring, the technician will conduct tests to verify that everything is functioning correctly.
The importance of regular maintenance:
To maintain the efficiency and longevity of your HVAC system, regular maintenance is crucial. Routine inspections can help identify any potential issues with the electrical wiring or other components, allowing for timely repairs or replacements. This proactive approach helps prevent emergencies and ensures the smooth operation of your HVAC system.
Remember, it is always recommended to hire a professional HVAC technician for emergency HVAC replacement and regular maintenance to ensure safety and optimal performance.
Step 11: Testing the HVAC System
Testing the HVAC system is a crucial step in the emergency HVAC replacement checklist. After installing new equipment, it is important to ensure that it is functioning properly and efficiently. Testing the system not only ensures the safety of the occupants but also guarantees the optimal performance of the HVAC system.
There are several aspects that should be tested during the HVAC system check:
- Heat Mode: Verify that the heating mode is operational and capable of providing sufficient warmth to the space. Ensure that the desired temperature can be achieved and maintained.
- Cooling Mode: Confirm that the cooling mode is functioning correctly and able to deliver a comfortable indoor temperature. Check that the desired cooling temperature can be reached and maintained.
- Airflow: Check the airflow in each area and ensure that it is consistent and properly balanced. Poor airflow can lead to uneven temperature distribution and reduced system efficiency.
- Thermostat: Test the thermostat controls to ensure they are responsive and accurate. Verify that the settings are correctly reflected in the operation of the HVAC system.
- Noise Level: Listen for any unusual or excessive noise coming from the HVAC system during operation. Unusual sounds could indicate a problem that needs to be addressed.
- Efficiency: Measure the energy consumption of the HVAC system to assess its efficiency. A higher efficiency rating indicates that the new equipment is functioning optimally, helping to reduce energy costs.
- Safety: Ensure that all safety features of the HVAC system are functioning as intended. This includes checking for proper ventilation, carbon monoxide detectors, and any other safety devices that are part of the system.
Regular maintenance and testing of the HVAC system is essential to maximize its performance and lifespan. Following this step-by-step checklist ensures a smooth emergency HVAC replacement process and guarantees the comfort and safety of building occupants.
Step 12: Inspecting for Proper Operation
After the emergency HVAC replacement, it is crucial to inspect the equipment for proper operation. This step ensures that your new HVAC system functions efficiently and safely.
Here are some essential tasks to include in your inspection:
- Check the thermostat settings to ensure they are accurate and programmable.
- Inspect the air filters and replace them if necessary to maintain optimal airflow and indoor air quality.
- Verify that all vents and registers are open and unobstructed.
- Test the heating and cooling modes separately to confirm proper functionality.
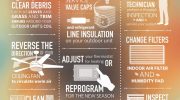
- Ensure the outdoor unit is free of debris and vegetation to promote proper airflow.
- Examine the condensate drain and clear any clogs or blockages to prevent water damage.
- Inspect the electrical connections and tighten any loose wires.
- Measure the temperature and airflow to ensure they align with manufacturer specifications.
- Run the HVAC system for an extended period to observe its performance and detect any unusual sounds or odors.
By thoroughly inspecting your HVAC system, you can identify and address any issues that may compromise its efficiency or safety. If you encounter any problems during the inspection, it is recommended to consult a professional HVAC technician for proper maintenance or repairs.
Step 13: Registering Your Warranty
Registering your warranty is an important step to ensure that your new HVAC equipment is protected and that you can take advantage of any benefits or services that come with it. By registering your warranty, you can have peace of mind knowing that you are covered if any issues arise with your equipment.
Here are a few key points to keep in mind when registering your warranty:
- Read through the warranty terms: Before registering your warranty, make sure to read through the terms and conditions. This will give you a clear understanding of what is covered and for how long.
- Complete the registration process: Follow the instructions provided by the manufacturer to complete the warranty registration process. This may involve filling out an online form or mailing in a registration card.
- Keep a copy of your registration: After completing the registration, make sure to keep a copy of the confirmation for your records. This will serve as proof of registration if needed in the future.
- Schedule regular maintenance: To maintain the validity of your warranty, it is important to schedule regular maintenance for your HVAC equipment. This can help prevent issues and ensure that your equipment operates at peak efficiency.
- Contact a qualified technician: If you encounter any problems with your HVAC equipment, it is important to contact a qualified technician who can assess the issue and provide the necessary repairs.
By following these steps and registering your warranty, you can maximize the lifespan and efficiency of your HVAC equipment while also ensuring that you are protected in case of any emergency replacements.
Step 14: Cleaning Up the Work Area
After completing the emergency HVAC replacement, it is important to clean up the work area to ensure safety and maintenance of your equipment. Cleaning up after the replacement not only improves the efficiency of your HVAC system but also reduces the risk of accidents or damage.
Here is a checklist of tasks to follow when cleaning up the work area:
- Remove any debris, tools, or equipment that were used during the replacement process.
- Sweep or vacuum the area to remove any dust or dirt that may have accumulated.
- Check the surrounding area for any spills or leaks and clean them up promptly.
- Ensure that all electrical connections are secure and properly insulated.
- Inspect the HVAC equipment for any signs of damage or wear and address them accordingly.
To maintain the cleanliness of the work area and prevent future issues, consider implementing a maintenance schedule for your HVAC system. Regular cleaning and inspections can help prolong the life of your equipment and improve its efficiency.
By following this cleaning checklist, you can ensure that your emergency HVAC replacement is not only successful but also leaves your work area clean and safe for both you and your equipment.
Step 15: Maintaining the New HVAC System
After emergency HVAC replacement, it is crucial to ensure proper maintenance of your new HVAC system. This will help to maximize its efficiency, prolong its lifespan, and ensure the safety of your home or office.
To keep your HVAC system in optimal condition, follow this checklist:
- Regular inspections: Schedule regular inspections with a qualified technician to check for any signs of damage, leaks, or wear and tear.
- Clean air filters: Clean or replace the air filters as recommended by the manufacturer to maintain the system’s efficiency and improve indoor air quality.
- Check thermostat settings: Ensure that the thermostat is set correctly and adjust as necessary for maximum comfort and energy savings.
- Clean the outdoor unit: Clear away any debris, leaves, or dirt from the outdoor unit to ensure proper airflow and prevent potential damage.
- Inspect and clean the ducts: Regularly inspect and clean the air ducts to remove any dust, debris, or mold that can hinder the system’s performance.
- Monitor energy usage: Keep an eye on your energy bills to track any sudden increases that may indicate issues with the HVAC system.
- Check for unusual noises or smells: If you notice any strange sounds or odors coming from the HVAC system, contact a professional technician immediately for a thorough inspection.
- Ensure proper ventilation: Make sure that all vents and registers are open and unobstructed to allow for proper airflow throughout your home or office.
- Invest in preventive maintenance: Consider signing up for a preventive maintenance plan with a trusted HVAC service provider to ensure regular upkeep and prompt repairs.
By following these maintenance steps, you can extend the lifespan of your new HVAC system and enjoy optimal comfort and efficiency throughout the year. Remember, a well-maintained HVAC system not only saves you money on energy bills but also provides a safe and healthy environment for you and your loved ones.
Q&A:
What is the purpose of an emergency HVAC replacement checklist?
The purpose of an emergency HVAC replacement checklist is to provide a comprehensive and organized guide for technicians and homeowners to follow when replacing a HVAC system during an emergency situation. It helps ensure that all essential steps are taken to complete the replacement efficiently and effectively.
What are the essential steps included in an emergency HVAC replacement checklist?
An emergency HVAC replacement checklist typically includes steps such as assessing the current HVAC system, determining the appropriate replacement equipment, scheduling the replacement, disconnecting the old system, installing the new system, testing and inspecting the new system, and educating the homeowner on its proper use and maintenance.
How does an emergency HVAC replacement checklist help with efficiency?
An emergency HVAC replacement checklist helps with efficiency by providing a step-by-step guide that helps technicians complete the replacement process in a systematic and organized manner. This ensures that no essential steps are missed and that the replacement is done as quickly and efficiently as possible.
Can homeowners without technical experience use an emergency HVAC replacement checklist?
Yes, homeowners without technical experience can use an emergency HVAC replacement checklist. The checklist provides clear instructions and guidance on each step of the replacement process, allowing homeowners to understand what needs to be done and potentially even perform some of the tasks themselves.
What should homeowners do if they don’t have an emergency HVAC replacement checklist?
If homeowners don’t have an emergency HVAC replacement checklist, they can contact a professional HVAC technician or company for assistance. These professionals will have the necessary knowledge and experience to guide homeowners through the replacement process and ensure that all essential steps are taken.
What is the purpose of the Emergency HVAC Replacement Checklist?
The purpose of the Emergency HVAC Replacement Checklist is to provide essential steps for homeowners or HVAC technicians to follow when replacing an HVAC system in emergency situations.
Who can benefit from using the Emergency HVAC Replacement Checklist?
The Emergency HVAC Replacement Checklist can be beneficial for homeowners who need to replace their HVAC system urgently, as well as HVAC technicians who are tasked with emergency replacements.